
Holey Roket can be made using a pipe for making briquettes as a model for the combustion chamber. It takes approximately 1 hour to mix the material and 1 hour to model the stove.
TOOLS
- clay – app. 10 kgs
- sawdust – 2x the amount of clay (per volume), or other insulating material
- water
- pipes (same as for making briquettes), or briquettes wrapped in cardboard
- cutting/modelling tool (for example big knife)
- desk to work on

Clay is mixed with sawdust, vermiculite or other material that provides insulation. Sawdust burns when the stove is fired in a kiln, which makes tiny air-bubbles providing important insulation (to keep the fire as hot as possible).
STOVE DIMENSIONS
30 cm high (12 inches)/ 25 cm long (10 inch)/ 20 cm wide (8 inches)
PIPE/MODEL DIMENSIONS
10 cm (4 inches) pipe diameter/ app 40 cm (16 inches) long (x2 pipes)/ 45 degree cut on one side
CLAY MIXTURE RATIO
2 parts of clay/ 4 parts of sawdust/ 1 part water
PROCESS
- Mix the clay, sawdust and water together. You can use your hands or feet
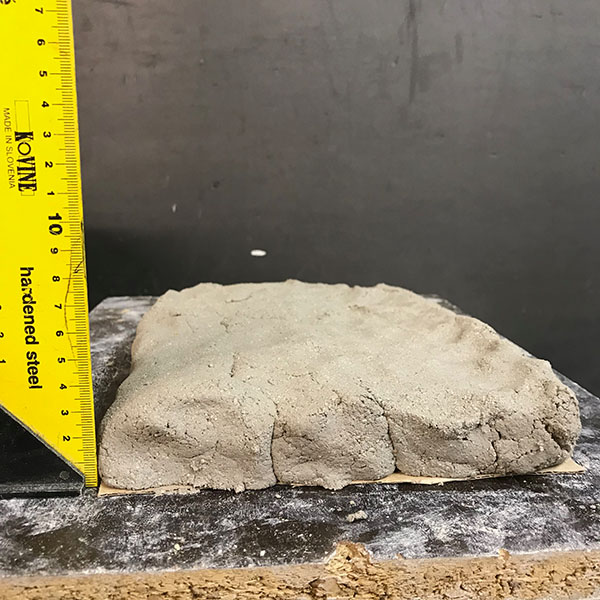
- Make a bottom of the stove app. 1 inch thick (3 cm)
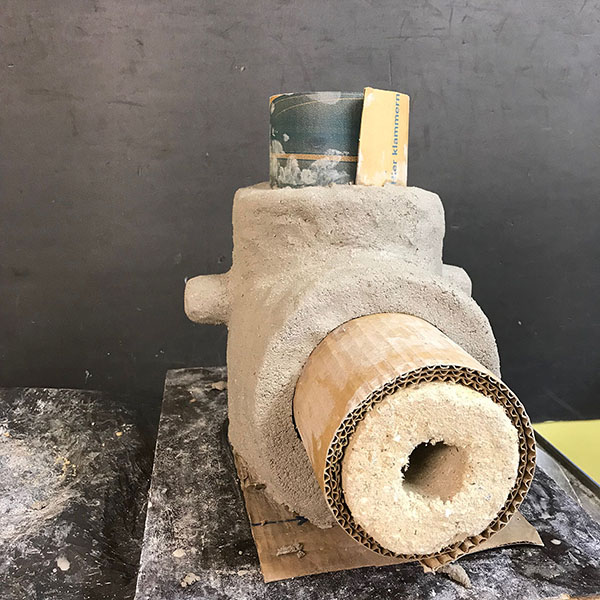
- put the shorter model of the pipe on top of the bottom. Make sure its centered.
- carefully model the walls of the stove around the model
- finish the surface of the stove as you like.
- Add the pot holders or cut them out the stove body.
- Attach the stove/briquette holders on the side with a slip or wet clay.
- Dry the stove slowly, so it doesn’t crack
- When its fully dry (test if the walls are warm), take the stove to local pottery shop or fire it in a pit fire.
- Wrap the stove with a wire so it doesn’t fall apart when it cracks. It will crack in time due to big temperature differences while using the stove. Its nothing wrong.


Please note:
you can use less sawdust for more durability – longer lasting stove, but the insulation property decreases – less efficient heat transfer). The mixture also varies according to available clay and sawdust (if particles are small, use less sawdust). Consider talking to the local pottery-maker, since they have experiences with local clays.
The mixture is applied around the plastic pipes with approximately 1 inch thick layer all around the pipes. Thicker walls will make the stove more durable, but will take longer for the mass to heat up, which can cause smoke before the stove heats up. Make sure the clay is applied with no bigger air gaps as the stove may crack during firing.
Briquette holders can be added to pre-dry briquettes at sides of the stove and hold the stove easier while hot. There could be 2 – 3 holders around the combustion chamber mounted approximately in the middle of the stove’s height. Make sure you make a a proper clay ‘glue’ when mounting them; they could fall off if not glued well.
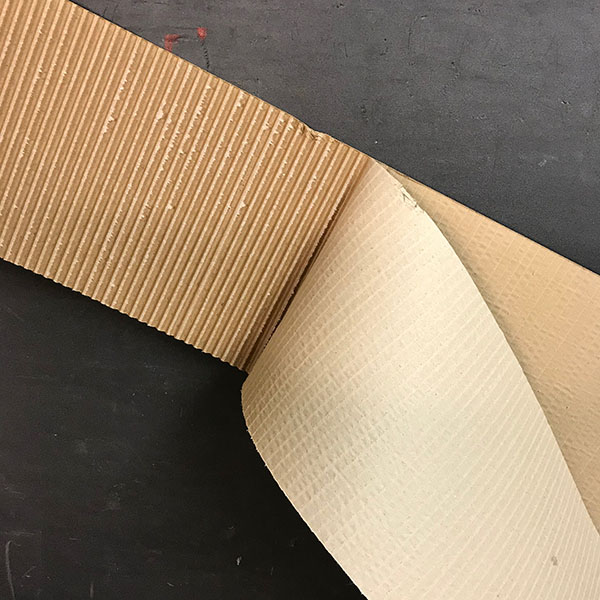
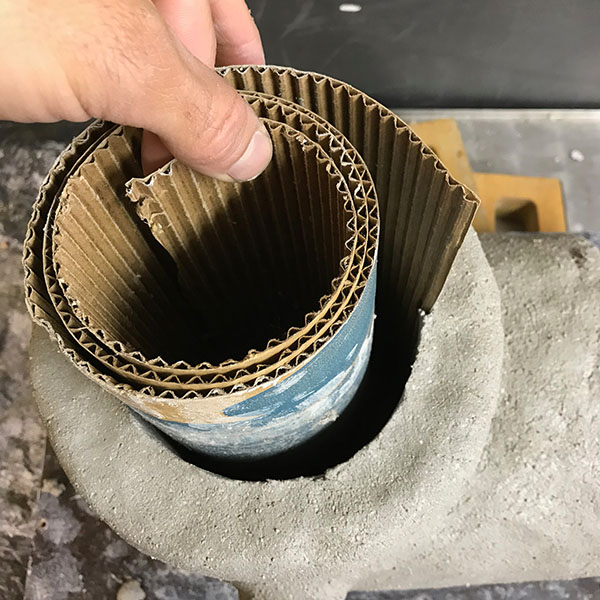
The pipes are then pulled out of the stove while its still wet. Be careful not to damage the round form on the bottom of the stove so briquettes can perfectly fit. If your clay shrinks a lot and you’re using the same pipes for making briquettes, you can add a layer of 5mm cart-board around the pipes to make sure briquettes will fit in the feed.
After app. a week or two of drying the stove (first in the shade so clay doesn’t crack) the stove is fired in a kiln. You know when a stove body is fully dry when it is not cold on a touch.
You can bake the stove with a local pottery maker, brick maker or you can make your own pit fire – check this post to learn how to bake stoves on your own
There is a referential video that explains the making process more in-depth. Please contact Rok for more additional info!
Metal casing
A metal casing could be made around the stove body to or the liner could simply be surrounded with mud or other material at hand.
Metal stoves are easy to make and light in weight but less efficient if not properly insulated. Durability can be significantly improved if the combustion chamber is ceramic as metal can burn out fast. Durability is improved also if a second or third briquette feed is introduced as the flames are not directed directly to the stove wall. Double or triple feed also increase the power-output as more briquettes are burned simultaneously.
The metal roket was made out sheet-metal material. The thicker the material, the more durable the stove – especially important is the combustion chamber due to direct flame exposure. This specific stove is 9inches high – higher stove would enable a cleaner flame, lower stove provides more heat output but. 10mm screws with 12mm head were used to enable the right gap between the stove top and pot bottom to enable an optimum heat transfer.
The gap between the combustion chamber and the outer cylinder can be filled with an insulation material such as vermiculite. The parts can be welded together and should fit as good as possible.

Dear Rok,
I am very much impressed by this technological design. Its actually a pity that i stumbled unto it only now.
Here in the PHilippines, the best option that i could see to make the briquettes is to shred the shells of the green coconut which are otherwise being dumped anywhere. Green coconut may be shredded with a machine which is now also being promoted by the government.
ONe question… did you have any experience making briquettes with rice husks?
Im a serious stover and have done a lot of models beginning with rice hull stoves, rocket stoves, wood gasifier, among others in my little shop.
I wish you the best and more energy in your undertaking.
Good day !
JEd
Hi Jed,
to answer your first post here, I don’t have experiences with rice-husks briquettes, but many people do – i know its working well. Ther are also ways to make coconut shells into briquettes. Its best you join the briquette network on the google groups, which is a vibrant place of briquetters from all over the world sharing knowledge about the technology. Most welcome to join and kind regards!
http://groups.google.com/group/fuelbriquetting
Mr. Oblak,
We are working on some briquette stoves for a project in Guatemala and wondering if we could use your models shown here at a presentation in DC for NCIIA that we are doing. this would give participants and possibly donors an idea of what a briquette-specific design could look like. Please let us know!
thanks,
Mike and the CU-Boulder Briquette stove team
Hi Mike,
you are most welcome to use the material from my website. If you need something more specific, please contact me on my email rok.stoves@gmail.com and will be glad to help you! I’d like to hear about your progress as well, so feel free to drop me any photos you can – i can comment on it as well if you want!
Cheers
Rok
How long did you leave the clay before removing the pipes? Did you coat them in vaseline or anything?
I’m attempting to make another stove now as the first one I couldn’t remove the darn pipes and had to destroy it 😦
My idea that I’m trying out is to wrap the pipes in cardboard taped at the top, so when done I just have to undo the tape and pull the pipe out.
Hopefully it works, if it does I’ll send you a photo of the finished product!
Hi Pete,
I removed the pipes as soon as i’ve finished the modelling. The clay needs to be as dry as possible (when modelling) but still wet enough not to have any cracks when making the shape of the stove. I did waxed the pipes a little before starting. At the end, you slowly rotate the pipes in the clay and you should be able to get them out easily! Check the videos about making, maybe it will help.
Feel free to send me any photos and i will try to post them with your comment and experience!
Thanks and good luck!
Rok
Hello, I would want to know which materials are the best in producing briquettes? (sawdust, charcoal dust or grass), and in which ratios with what binder (paper or cassava flour).
thanks
Robert
Hi Robert! Best materials are the ones that burn best, but if they have any binding properties that always helps as the briquettes become harder and more compact. So, best burning materials are any types of sawdust or other scrap-wood chips in different sizes, leaves, grass, husks and other not-yet processed materials burn a bit slower and usually can contain oil (these materials need to be processed properly, usually in a manner of drying-composting-shredding-blending. Good binders that burn are waste paper, cardboards.. and dung, which as you may know is regularly being used as a cooking fuel in many countries and even being sold as such on the market (like cow-patties).
As we don’t use any artificial binders, its good to always have some kind of a binder to provide the compactness of the briquette, usually it needs just a little paper to do so (like 10% of the paper mixture with sawdust, leaves, etc)
You can also use charcoal particles or leftovers as part of the briquette mixture, they’re doing so in many parts of the world, but i find charcoal a bit too slow burning for this type of a roket stove – it works better on a grill type stove
You can find a lot of additional info on Legacy Foundation website, where you can also get manuals on how to make the briquettes, briquette presses and everything around it, even recipes and proceeses how to prepare the material
http://www.legacyfound.org/
Hope this helped you a bit!
All the best!
Rok
You were asking for specific ratios using paper or cassava flour; i have lots of experiences using paper, and as said, you can use from 10-100% paper briquettes, depending on availability and other materials mixed in. I don’t know about cassava, but i can ask people who are using it, or you contact Richard Stanley from Legacy Foundation, who knows many many successful recipes around the world. It would definitely help if you can list down all materials you have available in your local area!
this is Richards email
rstanley@legacyfound.org
Hi Rok,
I have a question. I’ve tried making your stove using clay and sawdust. But when I took a stove to be fired in a kiln the stove caught on fire and ruined the kiln. Have you or anyone else had a similar experience when firing? I believe this happened because of the sawdust being mixed in the clay.
Thanks for your work!
Hi Ryan, sorry to hear about your kiln! If you mix the clay with sawdust, you have to burn the clay in a kiln with a good ventilation system. In the countries where the briquettes are usually used for fuel, they have the kilns outdoors, so there are no problems with this issue
Hello Rok
I have finally made your stove tonight. Took me 3 hours from beginning to end but I hope to shorten the production time. I’m now a bit worried about my electric kiln being ruined – the sawdust I used was pretty rough. My studio has lots of ventilation but am worried about flames inside the kiln. So – how about if I carefully first pit-fire the stove to burn out some sawdust and then fire in the kiln? Any reason why not? I have quite a bit of experience pit-firing my own work.
I really appreciate you sharing your work, videos etc.
Thank you
Jean
Have the Holey Brickette ever been used on an industrial scale, say 100,000 BTU/hr or 30 KW/hr)?
I don’t think so, in majority they are produced manually – with several different press-designs. Please check http://www.legacyfound.org/ if you want more info on this issue. Mr Richard Stanley is an expert on holey briquette manufacturing
Dear Rok, Great to see your contributions and wider outreach by designing briquette stoves.. I am very happy. http://saibhaskar.com